The Ultimate Guide To Using A 3-Point Slinger For Camera Mounting And Stability
Whether you’re a professional photographer or just starting out, mastering the technique of using a 3-point slinger for camera mounting is an essential skill for creating smooth and steady footage. This Ultimate Guide provides the basics of using this type of mount with detailed tips and tricks to help you get the most out of your shots. From properly setting up your 3-point sling system to maximising stability when capturing video, find out all you need to know about using a 3-point sling here!
Introduction to 3-Point Slinger for Camera Mounting and Stability
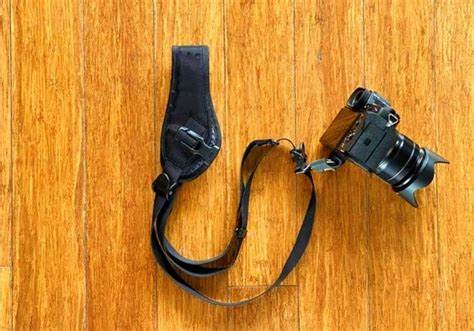
A 3-point slinger is a type of camera mount that is used to stabilize and secure a camera. It consists of three points of contact: two at the top of the camera and one at the bottom. This design provides more stability than a single-point or two-point sling, making it ideal for use with larger cameras or in rougher conditions.
When choosing a 3-point slinger, it is important to consider the weight and size of your camera, as well as the type of terrain you will be using it on. There are many different designs available, so it is important to find one that suits your needs.
If you are looking for extra stability, a 4-point or 5-point slinger may be a better option. These have four or five contact points respectively, providing even greater stability. However, they can be more expensive and may not be necessary unless you are using a very large camera or shooting in extremely rough conditions.
Different Types of Slingers Available
There are many different types of point slingers available on the market. Each type has its own advantages and disadvantages, so it is important to choose the right one for your needs.
The most popular type of point slinger is the elastic band slinger. This type of slinger uses an elastic band to create tension between the camera and the mount, which provides stability and prevents the camera from moving around. However, the elastic band can sometimes snap suddenly, which can damage the camera or cause it to fall.
Another type of point slinger is the rope slinger. This type of slinger uses a rope to create tension between the camera and mount. This provides stability and prevents movement, but it can be difficult to adjust the tension properly.
The third type of point slinger is the cable slinger. This type of slinger uses a cable to create tension between the camera and mount. This provides stability and prevents movement, but it can be difficult to adjust the tension properly. Additionally, cables can break if they are not used correctly.
Pros and Cons of Using a 3-Point Slinger for camera
There are many reasons to use a 3-point slinger for your camera needs. Here are some pros and cons to help you decide if it is the right tool for you:
PROS:
-Allows for a lot of movement and versatility while shooting
-Very secure and stable
-Easily adjustable
CONS:
-Can be difficult to setup and get the perfect shot
-Not as mobile as other camera mounting options
How to Setup and Use a 3-Point Slinger for camera
If you’re looking for a way to add stability and support to your camera, then a 3-point slinger is a great option. Here’s everything you need to know about setting up and using a 3-point slinger for your camera.
The first thing you’ll need to do is secure the slinger around your waist. You can do this by threading the belt through the loops on the slinger, or by tying the slinger onto your belt. Once you have the slinger secured, put your camera in the middle of the sling.
Next, take hold of the two outer straps and put them over your shoulders. Make sure that the camera is resting securely against your chest before tightening the straps. Now you’re ready to start shooting!
To get the most stable shots possible, make sure that you keep your elbows close to your body and tuck in your chin. This will help keep the camera from moving around too much as you shoot. And finally, when you’re done shooting, be sure to loosen the straps so that you can remove your camera safely.
Tips on Improving Balance and Stability When Using a 3-Point Slinger
If you’re using a 3-point slinger for your camera mounting and stability needs, there are a few things you can do to improve your balance and stability. First, make sure that the tripod is set up on level ground. If it’s not, the camera will tend to tilt to one side or the other, which will make it difficult to keep the camera steady. Second, when you’re setting up the tripod, make sure that the legs are spread out as far as possible. This will help to keep the tripod from tipping over. Finally, when you’re using the tripod, don’t put too much weight on one side or the other. Try to keep the tripod balanced so that it’s easy to move and doesn’t tip over.
Examples of Cameras Suitable for Use with a 3-Point Slinger for camera
When it comes to finding a camera that is suitable for use with a 3-point slinger, there are many different options available on the market. However, some of the best cameras for this type of setup are those that offer both good image quality and shooting speed.
Some of the most popular cameras used in this type of system include the Canon EOS 7D Mark II and the Nikon D750. These cameras offer great image quality and fast shooting speeds, making them ideal for capturing action shots. Other great options include the Sony A77 II and the Fujifilm X-T2, which both offer excellent image quality and fast shooting rates.
When choosing a camera for use with a 3-point slinger, it is important to consider what type of photography you plan on doing. If you plan on taking mostly action shots, then a camera with a fast shooting rate is going to be your best bet. However, if you plan on taking more static photos or landscape shots, then a camera with good image quality will be more important.
No matter what type of photography you plan on doing, there is sure to be a camera out there that is perfect for use with a 3-point slinger. By taking the time to find the right camera for your needs, you’ll be able to get the most out of your 3-point slinger and capture amazing photos and videos.
Conclusion
To wrap up, we’ve gone over why the 3-point slinger is a great tool for camera mounting and stability. The three points of contact allow for more stable footage when capturing movement or using extreme angles that would otherwise require an additional piece of gear. Its design also makes it incredibly easy to use in almost any situation, giving you peace of mind knowing that your equipment won’t be damaged or slip out of place during filming. We hope this guide has equipped you with enough information to get started on making better videos with this dynamic but simple device!